


Drone is a continuous integration platform. It is very easy to use. In this article, let's build a CI pipeline with Drone and Github.
Prepare public address
We need a public address so Github can access later. We can use create one from any cloud providers. Or we can use ngrok to create a temporary public address to map to localhost.
Make sure you follow the installation process of ngrok. Then run the following command:
ngrok http 8080
This will create a public address and map it to localhost 8080 port. My temporary address is like below.
https://8b40-240f-71-d32d-1-1db7-6b5b-9f89-3678.jp.ngrok.io
Register Github OAuth App
Because later our drone server need to comunicate with Github, so we need to register a Github OAuth application.
Follow the steps to go to the application form: Settings => Developer settings => OAuth Apps => New OAuth App.
Then fill the form:
- Application name
- Homepage URL: the ngrok address
- Authroization callback URL: the ngrok address +
/login
After registration we should get a client ID like c120ee11cffe7ee8be89.
Then we need to click the generate a new secret button to generate a secret: 5a0ee55ef9387ed51e7747ccf4f9cc1dd8639aca.
Generate a secret
Just generate a random string is ok.
% openssl rand -hex 16
85ff2888307465a7680dd8d6742df825
Start drone server
The doc for installing drone server is here.
- pull
docker pull drone/drone:2
- run
docker run \
  --volume=/var/lib/drone:/data \
  --env=DRONE_GITHUB_CLIENT_ID=c120ee11cffe7ee8be89 \
  --env=DRONE_GITHUB_CLIENT_SECRET=5a0ee55ef9387ed51e7747ccf4f9cc1dd8639aca \
  --env=DRONE_RPC_SECRET=85ff2888307465a7680dd8d6742df825 \
  --env=DRONE_SERVER_HOST=8b40-240f-71-d32d-1-1db7-6b5b-9f89-3678.jp.ngrok.io \
  --env=DRONE_SERVER_PROTO=https \
  --publish=8080:80 \
  --restart=always \
  --detach=true \
  --name=drone \
  drone/drone:2
Some parameters:
- DRONE_GITHUB_CLIENT_ID
- DRONE_GITHUB_CLIENT_SECRET
Check previous Github OAuth registration process.
- DRONE_SERVER_HOST
The ngrok public address we generate before.
- DRONE_RPC_SECRET
The secret string we generated before.
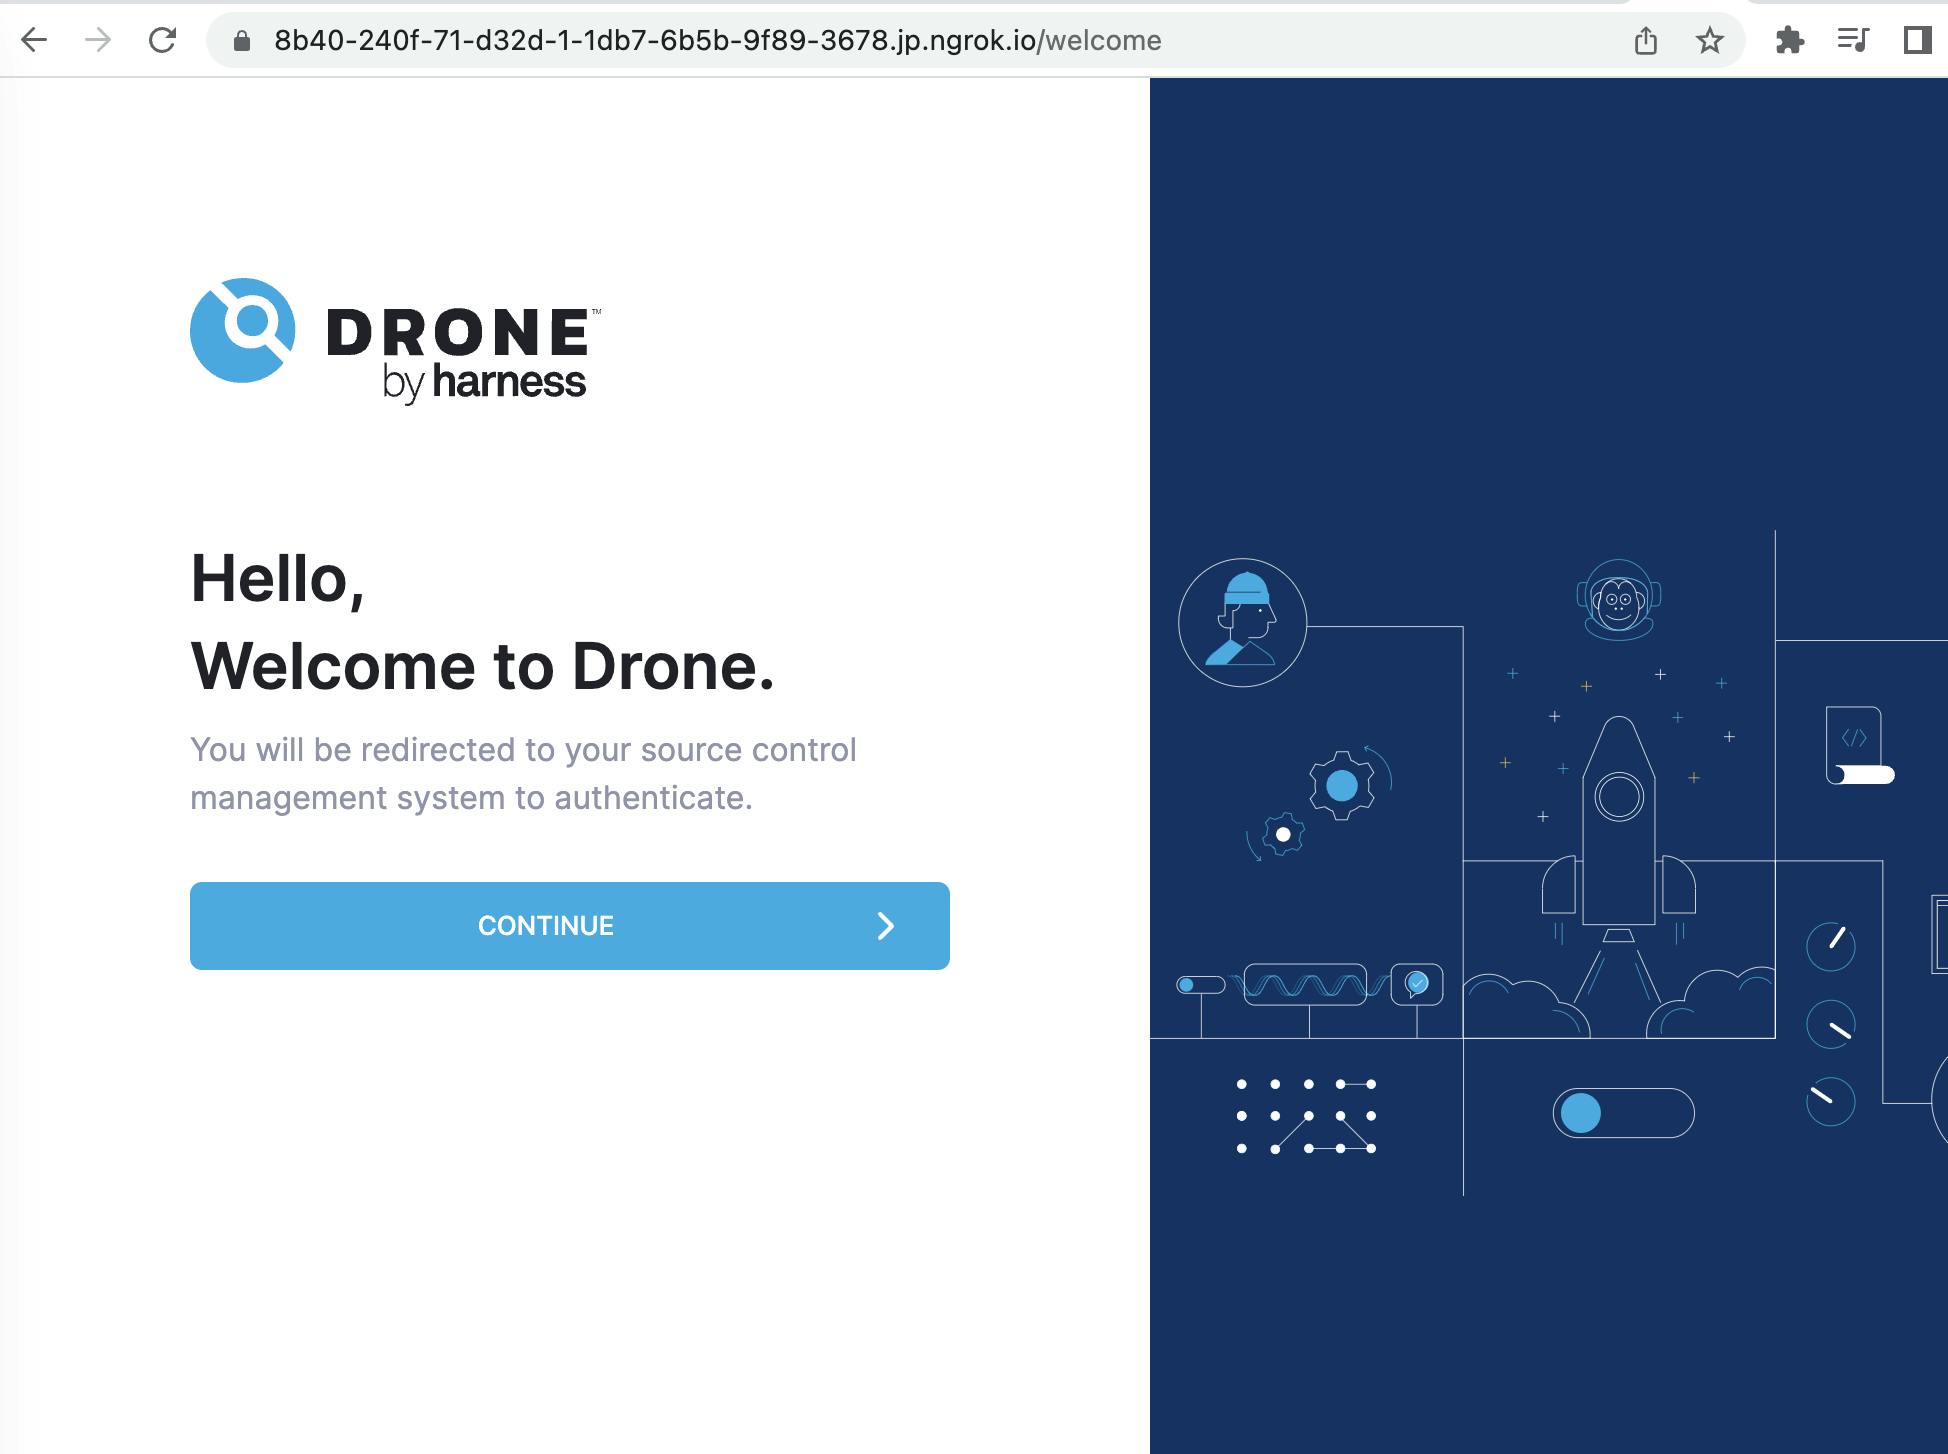
If the server started successfully, then we can open the ngrok address and see the welcome page:
Install runner
The doc for installing runner is here.
- pull
docker pull drone/drone-runner-docker:1
- run
docker run --detach \
  --volume=/var/run/docker.sock:/var/run/docker.sock \
  --env=DRONE_RPC_PROTO=https \
  --env=DRONE_RPC_HOST=8b40-240f-71-d32d-1-1db7-6b5b-9f89-3678.jp.ngrok.io \
  --env=DRONE_RPC_SECRET=85ff2888307465a7680dd8d6742df825 \
  --env=DRONE_RUNNER_NAME=my-first-runner \
  --publish=3000:3000 \
  --restart=always \
  --name=runner \
  drone/drone-runner-docker:1
Some parameters:
- DRONE_RPC_HOST
The ngrok address we generate before.
- DRONE_RPC_SECRET
The secret string we generated before.
Config drone
Now go to the welcome page again, click the CONTINE button. Then the page will be redirectly to Github OAuth, click Authorize, follow the normal process, then we should see a list of repos of your github.
Select the target repo, click activate button, then drone for this repo should be enabled.
Run CI
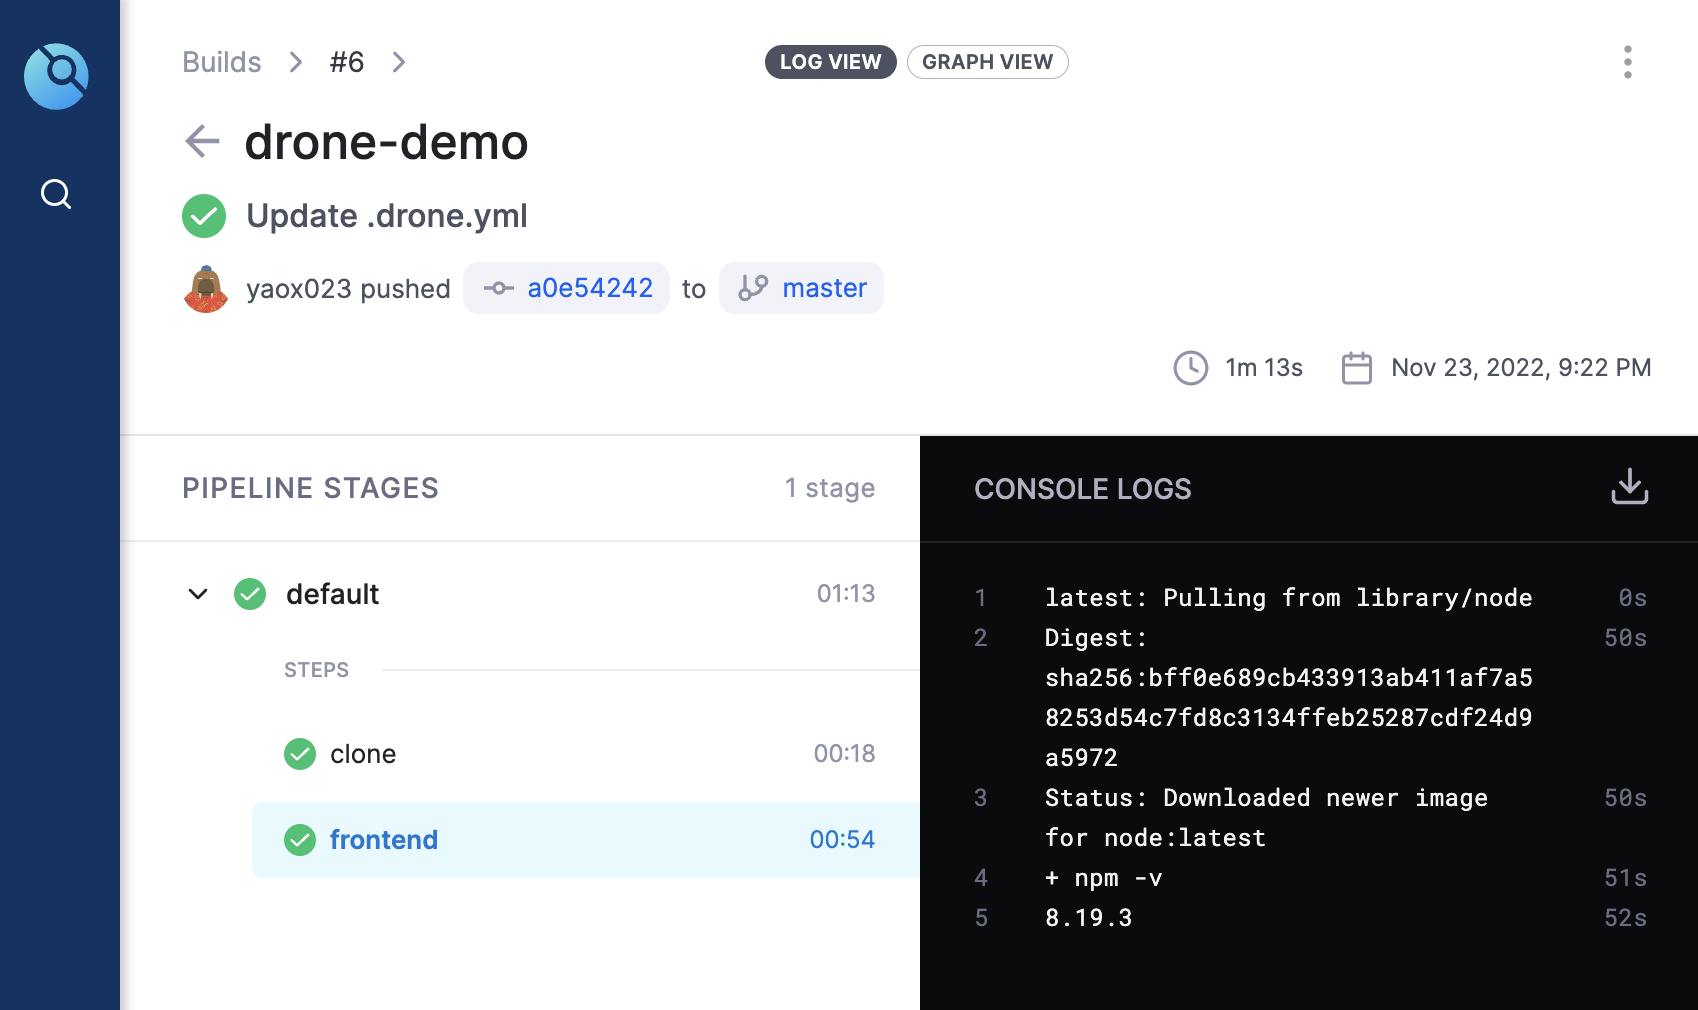
Now the continuous integration process is enabled. Every time we push to the repo, the process should be triggered.
What should we do now is to tell the CI what to do. Create a .drone.yml file in the root directory of the repo, and put below content.
---
kind: pipeline
type: docker
name: default

steps:
- name: frontend
  image: node
  commands:
  - npm -v
This yaml file defines a pipeline to start a nodejs image and runs the target commands.
When everytime we update the repo, the pipeline should be triggered and we should see the process like below.